Close
You have no items in your shopping cart.
Search
RSS

Blog posts of '2025' 'May'

Mastering Drivetrain Conversions: The Role of Bellhousing Adapter Kits and Index Reducers

When you’re swapping your stock engine and/or transmission for a different model, the right parts and accessories are a must to ensure the performance upgrade you paid for. In these situations, modders will almost always need a bellhousing adapter, and they may require a bellhousing index reducer, too. Why are these parts important and what do they do? Advance Adapters has the answers to these questions and others to help beginner DIYers.

What Is a Bellhousing Adapter?

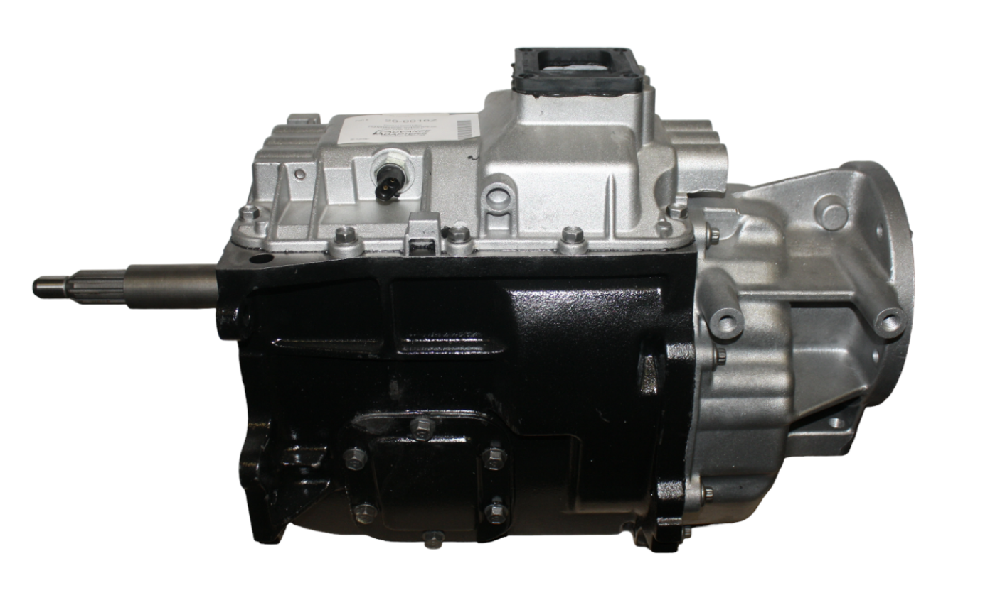
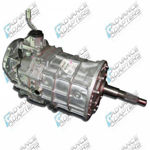
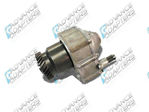
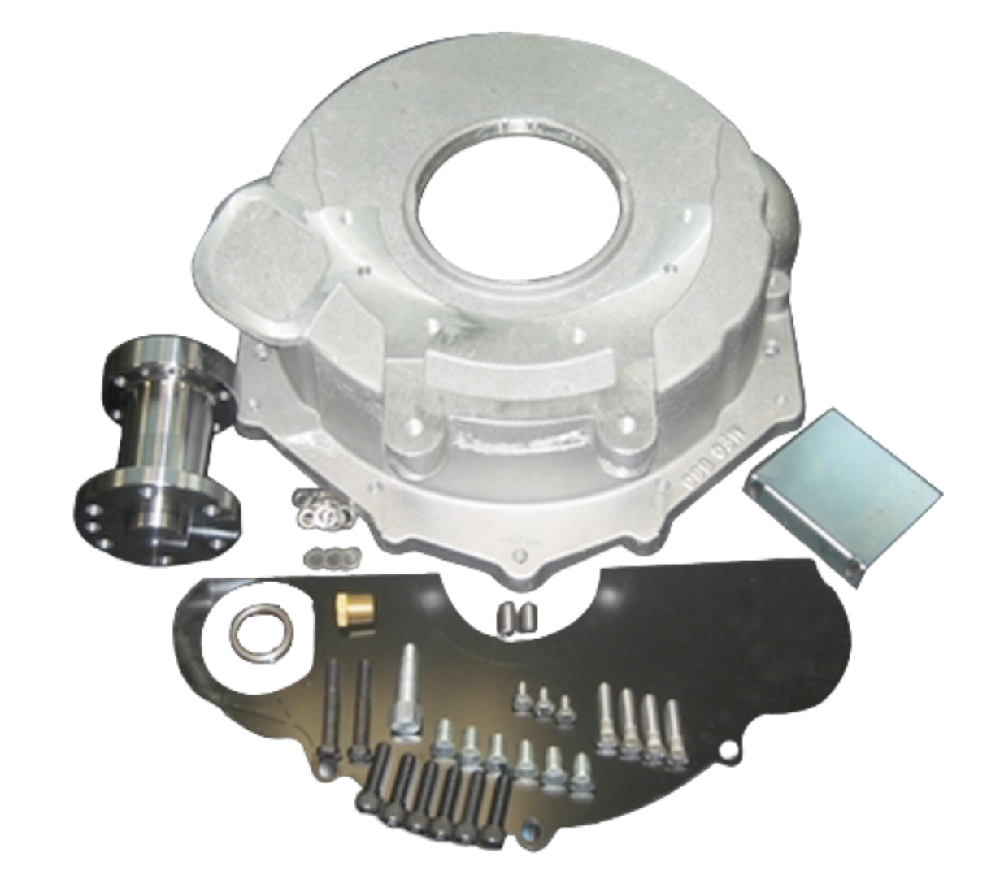
A bellhousing adapter allows you to connect engines and transmissions that weren’t originally designed for each other. In factory form, these components are made for certain connections. For example, OEM AX15 and NV3550 transmissions were mated to an AMC 258 4.2L or Jeep 4.0L engine. If you want to pair these transmissions with another engine, such as a Ford 302 or Chevy LS, the transmission input shaft or torque converter will not link properly because the engine bellhousing has a different bolt pattern.

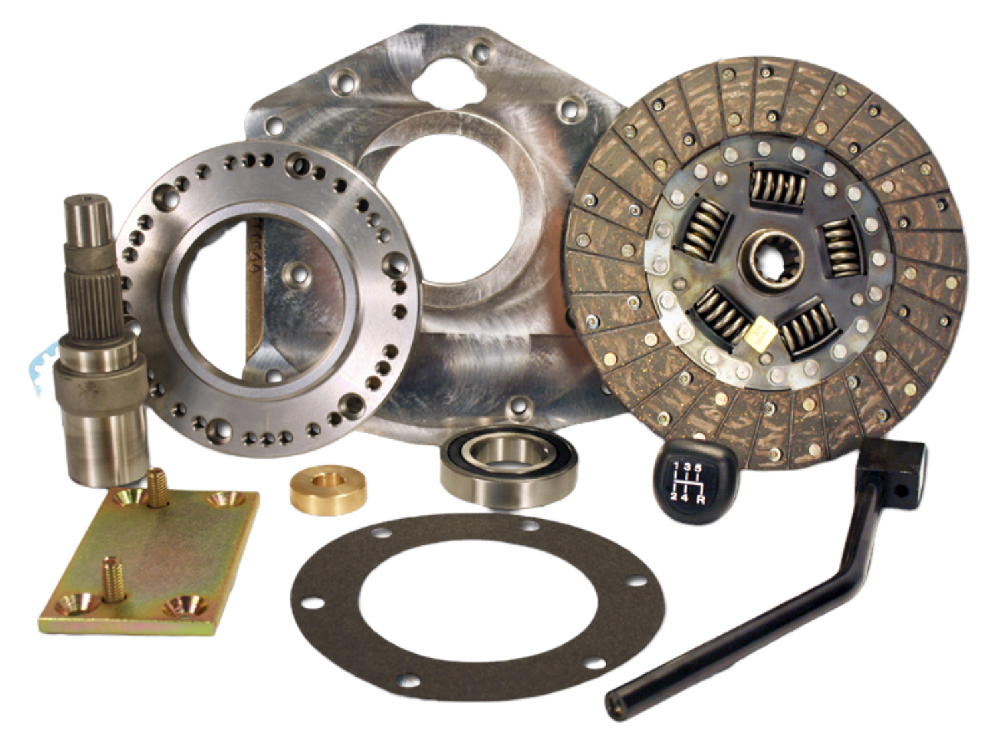
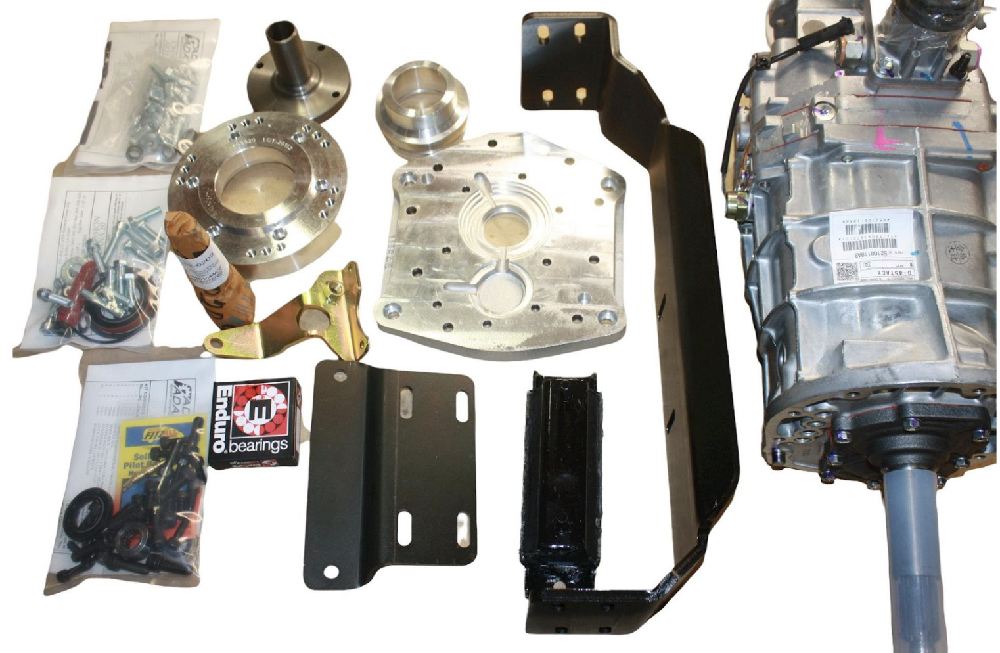
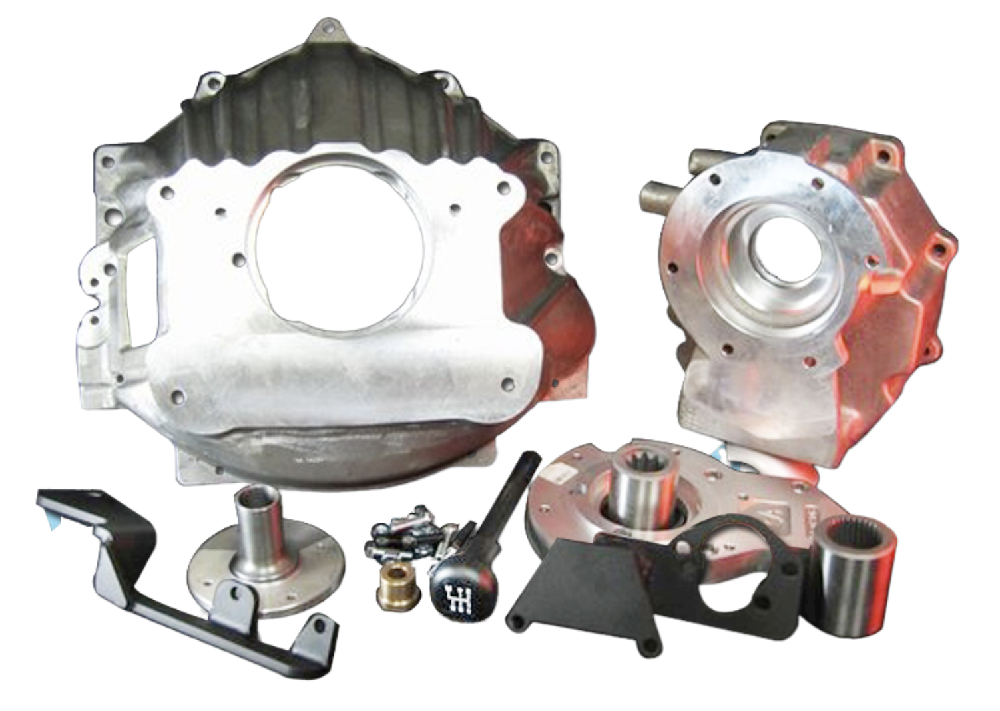
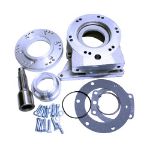
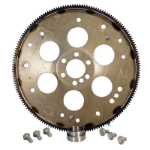
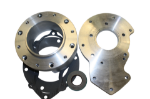
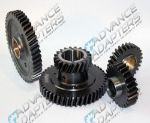
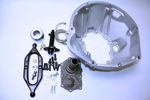
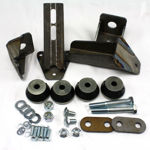
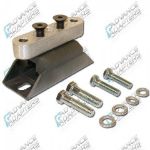
Engine-to-transmission adapters let these components fit together so you can run the combination you want with maximum power transfer, smoothness and longevity. Adapters are used to adapt a variety of components from automakers like Jeep, Ford, GM, Toyota and Honda. Kits contain various parts you need for a conversion, such as a new flywheel housing, flex and cover plates, temperature and oil pressure sender adapters and assorted installation hardware.

Note that before buying a bellhousing adapter package, you should ensure the transmission and engine power ratings are similar enough and that there is sufficient installation space for your desired combo. Just because you theoretically can mate an engine and transmission doesn’t mean you should try.

What Is a Bellhousing Index Reducer?

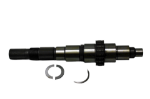
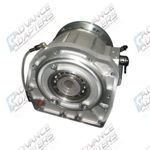
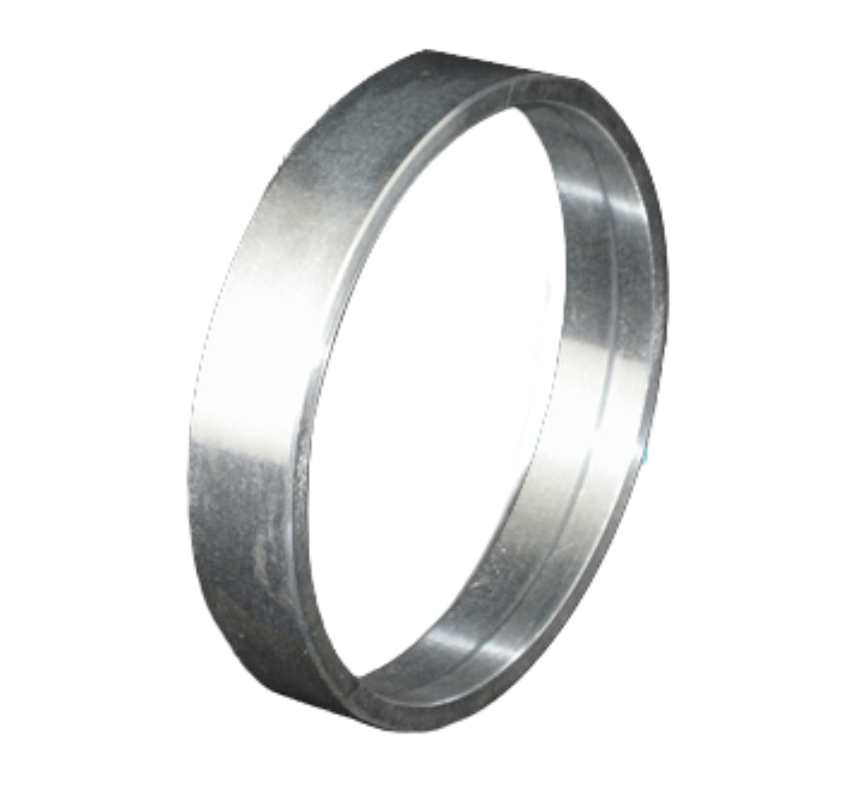
In certain situations, a bellhousing adapter may not be enough for your conversion; you may need an index reducer, too. The bellhousing index diameter is the size of the opening where the transmission input shaft goes, and it must be centered and aligned within 0.005 inches. Along with the bellhousing bolt pattern being different, the index diameter may be larger than tolerances allow. This is especially common when mating newer engines to older transmissions, as newer engines tend to have larger index diameters.

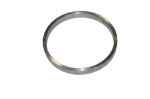
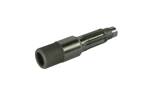
For smaller gaps, you can use offset dowel pins to make up the differences. Sometimes, though, a bellhousing index reducer is necessary. By inserting these aluminum adapter rings and retainers, you make the index diameter smaller so it’s easier to align the transmission shafts. You’ll need to measure the bellhousing index and transmission input shaft to determine what reducer you need; multiple reducers are often available for different drivetrain combos.

Connect Your New Drivetrain Components

Having the right adapters for a drivetrain conversion makes installation easier, improves performance and lowers the risk of early failure. Be sure to use high-quality bellhousing adapters and index reducers that can handle the extra power and torque you’re looking for. The experts at Advance Adapters can answer any other questions you have about drivetrain conversion adapters.

(0)
Deep Dive: NV3550 Retrofit Adapter Packages – Extending the Life of Your Classic Jeep

Thanks to Jeep’s legendary reliability, many vintage 4x4s are still found exploring off-road trails. Nevertheless, the powertrain may benefit from a few upgrades. In particular, a transmission swap can improve the drivetrain performance and make it more resistant to hard driving or impacts.

Replacing the original transmission with an NV3550 is a great way to get more years from your Jeep. In this guide, we’ll dive into how the NV3550 boosts performance and what to look for in an NV3550 retrofit adapter kit.

NV3550 Transmission Overview

As the replacement for the famed Aisin-Warner AX15 transmission, the New Venture Gear NV3550 was used in Jeep Wrangler TJ and Cherokee XJ vehicles from 2000 to 2004 with a 4.0L inline-six engine. This five-speed, longitudinal overdrive transmission has the following gear ratios:

  • 4.01:1, 2.33:1, 1.39:1, 1.00:1, 0.78:1, Reverse 3.57:1

The heavy-duty NV3550 is essentially version 2.0 of the NV3500 transmission, which was coupled with 1990s GM and Dodge V8 truck engines. The only difference is that the transmission case and bellhousing come as separate pieces instead of a single unit. This allows more swap and upgrade possibilities while maintaining the ruggedness and versatility. It’s a great transmission for many classic Jeep models, including the Jeep CJ, Comanche MJ, Wagoneer XG, Gladiator SJ and Wrangler YJ. You can adapt to other 4x4s as well, like the original Ford Bronco. Or get them as part of a more comprehensive Jeep overhaul, such as putting in a GM LS engine. Find more information about the Jeep NV3550 in our Tech Vault Knowledge Base.

NV3550 Transmission Retrofit Kits

Like any transmission swap, various parts are necessary to install an NV3550 in a Jeep for which it wasn’t a factory component. For starters, you need a bellhousing and adapter plate with the correct spline counts to connect the transmission input and output shafts to your engine and transfer case. These connections have small tolerances, so using the wrong adapters can quickly cause shifting difficulties, vibrations, leaks and more.

Other parts that are often necessary for an NV3550 swap include crossmember mounts, replacement clutch slave cylinders and gear shift handles. Of course, you must also use the proper hardware like nuts, washers and pilot bushings. In certain cases, you may need to modify other parts so the NV3550 will fit.

Although DIYers can track these parts down separately, buying a professionally designed NV3550 retrofit adapter package is the easiest solution (and often the most affordable). NV3550 retrofit kits like those sold at Advance Adapters include all the high-quality parts you need for common conversions, such as Jeep CJ-7 swaps that involve the AMC 4.2L engine and stock Dana 300 transfer case. They also come with installation instructions and verify compatibility.

Switching to a Jeep NV3550 Transmission

By equipping your classic 20th-century Jeep with a more powerful 21st-century transmission, it can continue blazing a trail into the next era of off-roading. Get the right retrofit adapter package and you’ll have a smooth transition to a new transmission.

(0)
The Future of Drivetrain Technology: Predictions and Innovations from the Experts

Vehicle drivetrains have come a long way from the early days of basic chains and belts. Sophisticated 4WD and AWD, new transmission designs and other technologies continue to advance — and they’re not even close to being done.

What will 4x4 owners consider standard 10, 20 or even 50 years from now? We looked at recent trends and found out what the experts are saying about drivetrain technology. Based on that, here are five things to watch that could impact not just 4x4 drivetrains but all vehicles.

Electrification and Hybrid Drivetrains

Electric drivetrain technology is expected to continue gaining market share due to a combination of advanced performance that drives demand and regulations concerning vehicle efficiency. Motor-driven electric drivetrains have proven to offer great power and efficiency. For example, the 2025 Ford F-150 Lightning electric truck delivers up to 580 hp and 775 lb-ft of torque. Over time, it’s reasonable to expect that range and reliability will improve as comparative costs drop.

Hybrid drivetrains are also back on the rise, with many new hybrid vehicles planned. By combining electric motors with existing internal combustion drivetrains, they offer some of the same power and efficiency benefits while largely functioning the way owners are used to.

More Efficient Transmission Designs

On a similar note, traditional transmissions and transfer cases continue to get better. Multi-speed automatic transmissions are on the rise because of their improved fuel efficiency. The most promising options include:

  • Continuously variable transmissions (CVTs) have smooth acceleration and great fuel economy.
  • Dual-clutch transmissions (DCTs) give you a sporty experience with their ultra-fast gear changes.
  • Automated manual transmissions (AMTs) can function in automatic or manual modes and offer simpler construction.

AI and IoT Integration

Artificial intelligence in vehicle drivetrains? Don’t count it out. Other vehicle features like adaptive suspensions have given us a taste of what AI- and Internet of Things-integrated drivetrain technology can do. Imagine transfer cases that adjust the low gear ratio in real time based on your driving style or transmissions that can sense when you’re about to start climbing a hill. It’s entirely possible, although when this may occur is hard to say.

The Rise of Part-Time 4WD

Traditional transfer cases were only capable of full-time 4WD — in other words, it was always on. In recent years, though, there has been an increase in part-time 4WD systems (also called on-demand 4WD). The driver can manually switch between 2WD and 4WD or let the system automatically detect when to switch. The benefits part-time 4WD offers for fuel efficiency, tire wear and drivetrain stress mean it is likely to become the norm rather than the exception.

More Safety Features

Safety has become a priority throughout the automotive industry, and many drivetrains already include built-in safety features like stability control, traction control, anti-lock brakes and electronic brake force distribution. These features will continue to improve and more are likely to come along. Assistance features such as blind spot monitoring and adaptive cruise control may gain even more control over the drivetrain, too.

(0)
How to Select the Right Gear Ratio for Your Specific Off-Road Terrain

Having the proper gearing ratio in a vehicle will give you the best combination of torque delivery, speed and fuel efficiency. Advance Adapters has previously discussed how gear ratios affect off-road performance from a general perspective. Today, we want to get more in depth about terrain affects gear ratio choice. While many factors go into picking a gear ratio, including your engine and tire size, driving terrain is arguably the biggest factor.

A Quick Recap of Gear Ratios and Performance

For those who are unfamiliar with how gear ratios change a vehicle’s performance, here’s a quick recap:

  • Lower numerical gear ratios offer more top speed, better fuel economy and less wheel slippage.
  • Higher numerical gear ratios offer better torque delivery, improved acceleration and more control.
  • The final drive ratio (FDR) is the best performance indicator; it’s calculated by multiplying the transmission, transfer case and differential (axle) gear ratios.

In what feels like an oxymoron, a lower numerical ratio is considered a “high gear,” and a higher numerical ratio is considered a “low gear.” For simplicity, we’ll talk in terms of numerical ratios.

When to Pick a Higher Gear Ratio

Generally, the more challenging the terrain you drive on, the higher your gear ratio should be. The best examples are if you regularly drive on steep hills, tackle dunes or do advanced rock crawling. With the extra torque delivery, you can more easily accelerate from a stop and have more control when navigating these surfaces at slow speeds. Some rock crawlers aim for an FDR as high as 130. To achieve this, you’ll need a very short first transmission gear — perhaps as high a ratio as 6:1 — plus a transfer case with a good low range.

When to Pick a Lower Gear Ratio

There are two situations where lower gear ratios are best. One is when you drive on a lot of slippery surfaces such as snow, mud and soft grass. Lower gear ratios are less likely to cause “wheel spin” and traction loss, especially for less experienced drivers. The other situation is you drive on a lot of flat, open terrain, such as well-packed sand and light off-roading trails. A lower ratio, such as a first gear around 3.07:1 and an FDR in the 50-79 will be able to take advantage of the higher speeds this terrain can handle.

When to Pick a Balanced Gear Ratio

Some 4x4 owners are reluctant to compromise. But when you drive on a lot of different off-road terrains or take overlanding trips, you may have to. A balanced off-road gear ratio — for example, a first gear in the 4.10-4:56:1 range and an FDR from 80 to 109 — lets off-roaders seamlessly switch between dunes, hills, snow, rocks and almost any other surface. You won’t get the absolute best performance on any of these terrains by using a balanced ratio, but it will be more than adequate, and certain drivers are happy to trade off max performance for the added versatility.

(0)
NV4500 & AX15 Adapter Packages: Enhancing Drivetrain Reliability

The most important thing when modifying a 4x4 drivetrain is ensuring it can handle the heavy forces of off-roading, towing, racing and similar applications. There are plenty of vehicles out there with the engine, driveshaft, axles and frame to do what you want — but the transmission is the weak point. The solution is upgrading to a heavy-duty transmission that’s built to be pushed hard.

The reliability of the NV4500 and AX15 has made them hot commodities in the DIY community. More than 30 years after these transmissions first appeared, they are still sought for swaps. However, you’ll need the right adapters to get the best performance. Advance Adapters has everything you need to know when choosing NV4500 and AX15 adapters.

About the NV4500 and AX15 Transmissions

First, here’s a quick overview of these transmissions and why they’re popular. The New Venture Gear NV4500 and Aisin-Warner AX15 are five-speed manual transmissions with a fifth-gear “overdrive.” The NV4500 uses a cast iron case and aluminum cover, while the AX15 case and cover are cast aluminum. The gear ratios are as follows:

  • NV4500: 6.34:1, 3.44:1, 1.71:1, 1.00:1, 0.73:1, Reverse 6.34 or 5.61:1, 3.04:1, 1.67:1, 1.00:1, 0.74:1, Reverse 5.61
  • AX15: 3.83:1, 2.33:1, 1.44:1, 1.00:1, 0.79:1, Reverse 4.76:1

The NV4500 was used in a variety of Chevy and Dodge trucks from 1992 to 2007, including GM 2500/3500 trucks and Dodge Ram 3500 trucks. The AX15 was used in Jeeps and Dodge Dakota trucks made from 1988 to 1999 with an AMC 4.2L 258 or Mopar 4.0L 242 engine. Visit our Tech Vault Knowledge Base for more information.

Adapters for NV4500 and AX15

When installing an NV4500 or AX15 transmission, many 4x4 owners are connecting it to a different engine and/or transfer case than it originally mated to. This means having the correct adapters and hardware for a secure, precise connection. Otherwise, instead of becoming more reliable, the drivetrain might well rattle apart. Depending on the amount of space underneath the vehicle, you may also need to modify the layout to fit the replacement transmission.

A typical NV4500 or AX15 transmission adapter package might include:

  • An adapter plate to fit the transmission output to the transfer case input shaft.
  • A bellhousing that will properly link the transmission input to the engine block.
  • A new clutch slave cylinder and disc to disengage the clutch when shifting.
  • A new crossmember and mounts to support the transmission.
  • A shifter handle and linkage to shift the transmission.
  • Upgraded transfer case output shafts and input gears to handle the added stress from the new transmission gear ratios.
  • Assorted brackets, bearings, seals, washers, bushings and other hardware.

Above all, be sure you’re getting an adapter package made for your drivetrain. There are plenty of options to fit popular Ford, Chevy, Toyota and Jeep OEM components along with aftermarket Atlas transfer cases. Whether you’re using these transmissions to connect a GM LS and Dana 300, a four-cylinder Jeep YJ and NP231 or some other combo, there’s a good chance there’s a kit available. Just double-check compatibility and fitment before purchasing.

(0)
Step-by-Step Guide to Installing a Transfer Case Rebuild Kit

Transfer case rebuild kits are a cost-effective way to restore a 4x4 transfer case by replacing common wear parts. However, installing them can feel daunting the first time or if you’re an inexperienced DIYer. This guide walks you through rebuilding and reinstalling a transfer case. The basic process is the same whether you’re working on an aftermarket Atlas transfer case or fixing an OEM component.

Transfer Case Overhaul

  1. Find the correct transfer case rebuild kit online or at a parts store.
  2. Lay out the parts and all necessary tools (wrenches, socket set, pry bars, etc.).
  3. Park the vehicle on a flat surface and engage the parking brake.
  4. Using a jack and jack stands or a vehicle lift, raise your 4x4 far enough off the ground so you can maneuver underneath it. Ensure the vehicle is stable before proceeding.
  5. If there is a skid plate covering the transfer case, remove this.
  6. Remove the transfer case drain plug and drain the fluid into a pan or container for disposal. Put the drain plug back on when you’re done.
  7. Remove the front and rear drive shafts. (Depending on the vehicle, you may also need to remove the shifting linkage and 4WD sensor.)
  8. Unbolt the transfer case and, if necessary, use pry bars to loosen it from the transmission.
  9. Carefully lower the transfer case from the vehicle. You might use a heavy-duty floor jack for stability.
  10. Set the transfer case on a flat, stable work surface.
  11. Remove the bolts connecting the transfer case housing halves and gently pry the halves apart. You can tap the pry bars with a rubber mallet for assistance.
  12. Clean the transfer case with a degreaser and inspect all components for damage.
  13. Remove all parts you need to replace in this order:
  • Retainer clips and rings
  • Seals
  • Output shaft drive chain or gear
  • Front output drive gear
  • Shifter shaft
  • Input shaft seal retainer and snap ring
  • Output flange
  • Synchronizers
  • Bearings
  • Gears
  • Output and input shafts
  1. Install new parts in the reverse order of removal, adding grease or lubricant as needed.
  2. Re-align the housing halves, gently press them together and reinstall the bolts following a crisscross pattern. This distributes pressure evenly to maintain alignment.
  3. Reinstall the transfer case in the vehicle.
  4. Align the driveshaft spines with the transfer case input and output shafts, then slide the driveshaft into position and tighten it.
  5. Remove the transfer case fill plug and use a fluid pump to add the recommended amount of approved fluid. 
  6. Replace the fill plug and inspect for any signs of leakage.
  7. Clean up and lower the vehicle.

Other Transfer Case Rebuild Tips

  • Work slowly and carefully. Going fast will greatly increase the risk of damaging other drivetrain components.
  • Keep track of all parts and hardware you remove, where they go on the vehicle and whether they require grease or lubricant. This will make reassembling everything easier.
  • Wear safety gear such as gloves and glasses to protect yourself from injury or chemical contact.
(0)
Customizing Your Jeep: The Ultimate Guide to Conversion Packages (TJ, YJ, CJ and More)

A big reason Jeep has remained one of the most beloved 4x4 brands for over 80 years is the almost limitless ways to customize its vehicles. From the old-school Jeep CJ and Wrangler YJ to the latest Jeep Wrangler JL, DIYers can use OEM or aftermarket parts to create custom Jeeps.

If you want the most adrenaline per dollar, though, a Jeep conversion package is the way to go. These packages make it easier to swap powertrain components so you can enjoy added horsepower, torque and reliability for everything from dune bashing to towing. Here are three types of Jeep conversion packages to consider and how they help Jeep owners immerse themselves in the outdoor lifestyle.

Jeep Engine Conversions

Although a decades-old Jeep is often still rugged enough to take on tough terrain, a tired engine may limit you. Converting to a new engine unlocks new possibilities for your off-roading. It doesn’t have to be a Jeep engine, either — swapping veteran V6 Jeeps to Chevy LS engines and other V8 power plants is popular in the modding community.

Of course, you need more than just the engine to complete the switch. A Jeep engine conversion package contains a variety of parts to complete the process, including transmission and bellhousing adapters, replacement motor mounts, fittings and slave cylinders. Some even include high-performance radiators and caps to help dissipate the extra heat a more powerful engine generates. Visit our Tech Vault Knowledge Base to find engine conversion information for generations of Jeeps.

Jeep Transmission Swaps

Even if you’ve upgraded the engine, you still must get that power to the wheels. A new Jeep transmission is sometimes necessary to handle the added power. Even if you’re not changing the engine, a new transmission can help you utilize the current motor more effectively. Go from a manual transmission to an automatic or vice versa, put a heavy-duty transmission in for extreme terrain or change to new gear ratios that give you better low-speed performance.

Transmissions like the TR4050 5-speed, NV4500 and AX15 have gained steam among Jeep owners. Like with engine conversions, you’ll need some additional equipment to change transmissions. These include mounts, engine and transmission case adapters, input and output shafts, yokes and transmission cooler lines. You might even add a new shifter to grab those gears.

Jeep Transfer Case Conversions

Switching to a different transfer case is another way to enhance Jeep 4x4 performance. Some Jeeps only have a one-speed transfer case; switching to a two-speed or even a four-speed transfer case will give you more gear ratios to adjust the torque delivery. Replacing an existing dual-range transfer case is sometimes necessary as well to achieve the right final drive ratio.

Get the low-range gears you want with a transfer case from another vehicle or an aftermarket Atlas Jeep transfer case. With our custom Jeep transfer case builders, you can specify the gear ratio so it suits how you drive. We also include installation equipment upon request with all the necessary parts and hardware.

(0)
Understanding Gear Ratios: How to Optimize Your Off-Road Performance

Having a great off-road 4x4 is about more than a powerful engine, rugged transmission or grippy tires. The gear ratios help determine whether a vehicle is a rugged rock crawler, an efficient highway cruiser or something in between. To help you gear your 4x4 correctly, Advance Adapters has put together this off-roading gear ratio guide with everything you need to know.

How Gear Ratios Work

We’ve discussed what gear ratios are previously, but here’s a recap:  every gear set has an output shaft (driven gear) and an input shaft (driving gear). The gear ratio measures how many times the output shaft turns for every one turn of the input shaft. You calculate this by dividing the number of teeth on each. So if the output shaft has 30 teeth and the input shaft has 20, the gear ratio is 1.5:1. Higher gear ratios deliver more torque to the wheels while lower ratios deliver less.

Veteran 4x4 owners think in terms of final drive ratio (FDR). To calculate this, multiply the transmission gear, transfer case gear and axle/differential gear ratio. For example, a 4.10:1 first gear, 4.30:1 transfer case low gear and 3.73:1 differential would be an FDR of 4.1 x 4.3 x 3.73 = 65.76. Something under 50 is good for daily driving, whereas the 110-130 range is recommended for extreme off-roading, with many options in between. Use the Advance Adapters Gear Ratio Calculator to see how a component changes the FDR.

What Factors Affect Off-Road Gearing?

Not only are there many types of off-roading, but how the rest of a vehicle is designed can impact gearing, too. As such, there’s no “one size fits all” gear ratio. Here’s what you should consider when choosing an FDR.

  • Engine Torque: The more torque your engine offers, the lower a gear ratio you can get away with. Smaller engines require higher gear ratios to perform the same tasks.
  • Tire Size: If you put tires on that are larger than the factory shoes, the effective FDR drops because the tires don’t have to rotate as many times to travel the same distance. Smaller tires have the opposite effect.
  • Terrain: We’ll cover this in more detail in another article, but the short version is that a higher gear ratio is better for steep inclines and rocks, whereas a lower gear ratio is better for flat terrain and slippery surfaces.
  • Driving Style: Higher ratios are better for slow, controlled off-roading in tight areas and around big obstacles. A lower ratio will be more beneficial for high-speed off-roading and beginner trails.
  • Payload and Towing: If you plan to carry a lot of passengers and cargo or tow heavy loads while off-roading, you will need a higher gear ratio to compensate.

There are two ways to alter the FDR. One is replacing the transmission, transfer case and/or axle with new components that have different gear ratios. The other is swapping the gears within the existing components. In both cases, make sure you order parts and adapters designed to fit your application and made of high-quality materials.

(0)
Troubleshooting Common Transmission Adapter Issues: Tips & Tricks

When swapping engines, transmissions and/or transfer cases, you often need to use a transmission adapter to connect components. However, other issues can arise that hurt performance and longevity. Here are five common transmission issues when installing adapters and how to fix them.

Bellhousing Alignment

The Problem: The bellhousing protects the flywheel assembly, and it must be aligned accurately with the transmission input shaft. Alignment issues are more prevalent when doing transmission swaps.

The Symptoms: A misaligned bellhousing can lead to vibrations, shifting difficulty, clutch failure, clunking sounds and even engine damage. It may also void the transmission warranty.

The Fix: Check that the bellhousing mounting surface and engine block are parallel. Then mount a dial indicator and magnetic base to the flywheel. Slowly turn the crankshaft to sweep the bore. If the total indicator change is higher than 0.01 inches, adjust the bellhousing with offset dowel pins.

Using the Wrong Adapter Plate

The Problem: Every drivetrain component must fit precisely, including the adapter plate. Unfortunately, some DIYers use a plate that wasn’t made for their specific combination.

The Symptoms: An adapter plate that’s even a little off can cause parts shifting out of place, gears catching, power loss and even total system failure.

The Fix: Change the adapter plate to one that matches your project. Advance Adapters guarantees each kit includes the correct plate for the listed transmission-engine-transfer case combination.

Using Low-Quality Parts

The Problem: The adapter plate and hardware must be able to handle the drivetrain forces. Some manufacturers use materials like stud-grade steel and cast aluminum, which aren’t strong enough for heavy-duty driving.

The Symptoms: Poorly-made adapters and hardware wear out faster and are more likely to cause shifting issues. They cost less upfront, but you pay for it later.

The Fix: Get a high-quality adapter made of strong materials such as billet aluminum, cast iron or high-strength steel to ensure durability.

Torque Converter Seating

The Problem: Automatic transmissions use a torque converter to transfer engine power. You need to remove the torque converter to install the adapter, and sometimes DIYers don’t seat it correctly when reinstalling.

The Symptoms: The converter won’t engage properly, so shifting is difficult or delayed. The converter may even come off the transmission pump.

The Fix: Reinstall the converter by greasing or lubricating the snout and sliding it onto the splines. Turn clockwise until you feel the converter clunk twice. The gap between the flex plate and converter should be between 1/8 and 3/16 inches; use spacers if necessary.

Broken Flex Plate

The Problem: Some automatic transmission adapters have a setup where the flex plate is no longer bolted to the torque converter. When this happens, it removes the support the flex plate needs, leaving it prone to bending and breaking.

The Symptoms: Signs of a damaged flex plate include heavy vibrations, strange noises while idling and shifting, power loss at high speeds and trouble starting the engine.

The Fix: One solution is bolting the flex plate to the flywheel. Another is using a stronger flex plate. In both situations, get the assembly re-balanced for the best performance.

(0)
How to Choose the Perfect Dual Transfer Case Kit for Your Off-Road Build

Serious off-roaders need more than an ordinary transfer case. A dual transfer case setup can give you the extra low-range gears needed for steep hills, rock crawling and other extreme conditions. In this guide, the four-wheel drive experts at Advance Adapters look at what this setup involves and offer tips for selecting the right dual transfer kit.

What Is a Dual Transfer Case?

The factory transfer case or even an aftermarket case may not provide enough low gearing options for your off-roading, towing and hill-climbing. By taking the reduction unit from a separate transfer case and attaching it to the output of the existing case, you create a dual transfer case setup. The two reduction sections can be used together or independently.

This setup gives you additional gear sets and torque multiplication for low speeds, challenging terrain and large tires. Adding a standard high-low reduction box to a two-speed transfer case will effectively give you a three-speed case with high, low and extreme low gears. By placing it on a three- or four-speed case, you get even more options. It’s a great choice for heavy-duty off-roaders, towers and anyone who needs more gearing options.

What to Consider for a Dual Transfer Case Kit

Like any aftermarket modification, you should carefully consider all factors before buying parts and components. Here are five important factors that go into selecting a dual transfer kit.

  • Decide what the purpose of the dual case is. Are you putting it in an exclusively off-road vehicle or a vehicle that must be good off-road and on-road? The less you drive the vehicle on main roads, the more aggressive your setup can be.
  • Consider how the additional gear sets affect the Final Drive Ratio (FDR). A dual transfer case is common for rock crawling, but going over an FDR of 130 is more likely to hurt than help. Our Gear Ratio Calculator lets you figure out potential new FDR numbers.
  • Look at what transfer cases and transmissions the kit is designed to fit. For example, our RubiCrawler dual transfer kit is made for Jeep Wranglers with a 42RLE transmission and an NP231, NP241 or RockTrac transfer case. (It can also fit aftermarket Atlas transfer cases made for these 4x4). If you’re adapting a 1979-95 Toyota truck transfer case, there are different kits for the 23-spline and 21-spline versions. Using the correct kit ensures the best performance.
  • Ensure the kit includes all required parts and accessories. To connect the second reduction unit, you need an adapter, housing, bearings, couplers and more. Some conversions also require electronic control modules. A reputable dealer will provide a full list of components and explain what they’re for.
  • Determine whether other modifications to your drivetrain are necessary. You may need to install shorter driveshafts to accommodate the additional equipment or move the exhaust and floorboards for clearance, especially with smaller vehicles. A good kit will tell you what needs to be done and should be backed by support from a knowledgeable team.
(0)
Blog archive